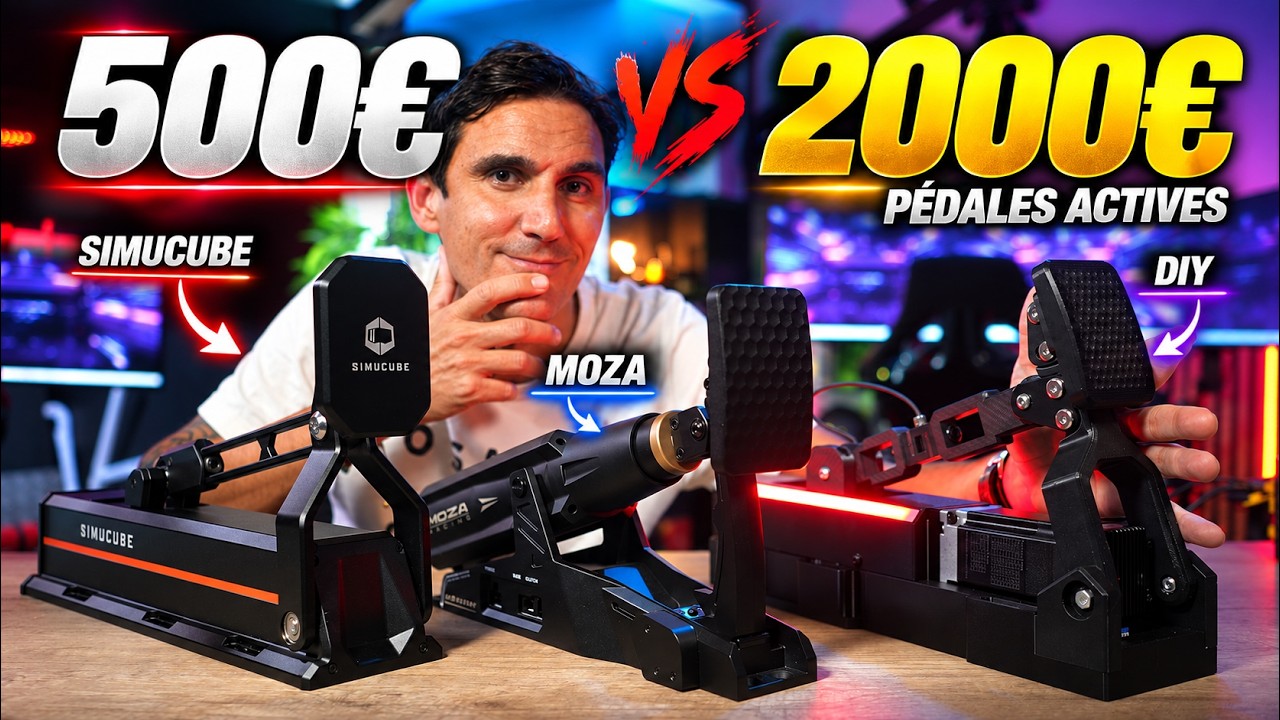
Two years after my first DIY active pedal, I present a V2 that simplifies the electronics and improves the mechanics. The new board allows assembly without electronic soldering, while the rail, printed parts and SimHub plugin develop the feel. I explain my construction, initial setup and adjustments, then describe what I experience compared with the commercial pedals I have tried.
PCBA V2: simplifying the electronics
The first version required several modules to be assembled and programmed. PCBA V2 brings that part of the project together. My unit is a V2.1; a V2.2 already exists when filming in June 2026. References therefore need to match the files for the chosen build.
I show ordering an assembled board through PCBWay and the benefit of a batch for building several pedals, keeping a spare or sharing an order. An additional board can serve as a bridge, connected to the PC and communicating wirelessly with the pedals. An ESP32-S3 DevKit is another option presented. Wireless operation concerns data: the pedals retain electrical power connections. The board also allows power to be chained between two pedals.
The video included a draw for three boards at release. For building the project, the useful resources remain the component list, printable files and documentation from the teams developing the electronics and software.
Understanding the mechanics before printing
The pedal fork operates a system of levers and bearings. The load cell reports applied effort to the board, and the motor moves the rail carriage to create the requested resistance. I adapted my frame to the wider new rail and integrated the PCBA to expose the connections neatly at the rear.
My design contains around twenty printed pieces and uses approximately two PLA spools in this build. It is divided to fit a Bambu Lab A1 print bed. Infill and print quality contribute to the rigidity I feel underfoot.
Several finishes are possible: a plain cover, illuminated cover or coloured trim pieces. I also provide an adaptation for a metal pedal face. Its main benefit is contact with the foot: I did not find the large difference in effect transmission I had imagined. The rail offers generous travel, but the portion actually used depends on the positions chosen in software.
Preparing parts and assembling the frame
I first prepare the bearing, nut and insert locations. A heat gun helps with certain insertions, while a soldering iron heats threaded inserts into the plastic: this operation does not involve soldering electronic components. In this version, washers bonded to the fork replace the bearings previously used at that location.
The two frame sections join through upper screws and sleeves retained underneath. The coupler then connects motor and rail, with fasteners maintaining their alignment. I place this assembly in the frame and secure it at the intended locations. For screw and sleeve lengths, I rely on the component list for this design rather than estimating from the image.
Assembling levers, fork and load cell
The front hinges receive the fork. Two further hinges attach to the carriage, with intermediate plates protecting the end of travel. I then prepare the pedal-face and push-arm joints. The face mounting allows its angle to be selected.
The fork connects to the frame without tightening its joints enough to obstruct movement. The load cell sits between the two push-arm sections. I connect their shorter side to the carriage and the other end to the fork. At this stage, the lever should move freely: the assembly takes its final shape before electrical connection.
Wiring and enclosing the power supply
I route the load-cell cable beneath the pedal, install the PCBA and prepare conductors to the required length. Supplied motor connectors serve their corresponding connections; for communication, the video mentions Dupont or JST connectors. Motor and board labels, together with the project diagrams, identify the connections. I also shorten the sensor cable while retaining its shielding connection and protecting it neatly.
The printed power-supply enclosure accommodates the switch and a cover screwed into inserts. It avoids leaving live parts accessible. I prepared some XT60 connectors myself, but preassembled versions are available. The cable between supply and pedal can also be bought ready-made: this is how the build remains possible without electronic soldering, provided suitable lengths are planned.
Flashing the board and entering geometry
The Webflasher performs an initial firmware installation over USB. I select the board’s role, version and firmware: a pedal control board and a bridge should not simply receive the same default choice. The project plugin is then placed in the SimHub directory. Its system settings also update the plugin and flash boards.
Before using the pedal, I enter “Pedal Kinematics”: mechanical dimensions, rail pitch and the installed sensor’s characteristics. The actual build’s values matter. I then run initial calibration. With the bridge, I assign each pedal its role, brake or throttle, and check that it appears connected in the plugin.
Adjusting travel, force and the game signal
Start and end positions determine available travel. I can move the starting point beneath my foot, retain short brake travel or lengthen the throttle for easier modulation, particularly when drifting. Maximum force changes resistance; preload adds initial effort before the pedal begins to yield. Damping and elastomer-effect filters remain available, although I use them little in this configuration.
“Joystick mapping” separately adjusts the signal sent to the game. I add an initial zone so that resting my foot does not trigger braking, then define where 100% is reached. This differs from the mechanical stop: maximum signal can be reached while some movement remains.
Profiles save these choices. ABS has intensity, amplitude and frequency settings. Other effects include engine speed and G forces; I have not tested every effect and do not routinely enable engine vibration.
Controlling settings from the seat
To avoid constantly returning to the SimHub window, I created a dashboard that recalls profiles and adjusts travel, force, preload and effect activation. I demonstrate it on a touchscreen, with the brief delay needed to apply certain commands. The dashboard and its module are offered in a video reserved for channel members.
Two identical pedals can also switch from brake and throttle to a rudder mode. Abrupt inputs produced some stuttering, while progressive movement better suits the flight-simulation use tested. The L’Atelier community’s Control Center is also presented as a forthcoming development during filming, rather than a required construction step.
What the tests reveal
With the software version used, I find movement smooth, responsive and much quieter than my earlier versions. The rail is barely noticeable; at very low resistance, its presence can become slightly apparent again. Throttle use convinced me despite my initial scepticism.
The main limitation remains ABS: intensity depends on firmware, and I still experienced missing or delayed activation at full travel, sometimes only when releasing. In this personal comparison, Simucube remains more convincing for that effect. The rest of the braking feels sound and consistent, without my occasional rally result constituting a measurement isolating hardware performance.
Finally, I pay attention to heel support and positioning on the cockpit. Comfort matters as much as effects. The project still requires hands-on construction and initial configuration, but V2 makes these stages more accessible. Its appeal comes from the result underfoot and the ability to understand, modify and develop a pedal I built myself.
Join the discussion on YouTube